| How to Build Your First Surfboard by Stephen Pirsch |
|
HOME
This is your site. It is not biased by any direct advertising and no money is accepted for any links shown. It is made for you and supported by you. PLEASE DONATE!
HALL OF FAME Mark Sadler |
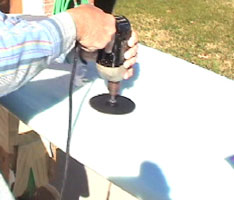
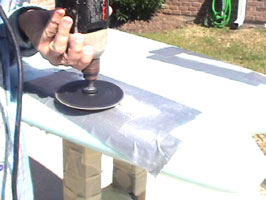
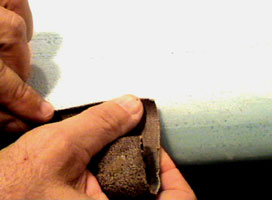
SANDING It is better to sand too little than sand too much. Assuming no power sander, put a 5" rubber backing pad and #50 sanding disk(s) on the drill (if you put multiple sanding disks on the pad it will sand smoother). It would be preferable that the drill have two handles, a maximum rpm range of 2000 to 3000 and, variable speed. You will be able to find one for less than $30 - (2008) if you will accept an "off" brand. See www.harborfreight.com Put on your respirator with a dust cartridge. If you can't get a respirator at least wear a dust mask and take everything outside in the wind or use a fan. Completely cover your body, including your head. If you won't do this get some baby powder and work it in to all your exposed skin. If the sanding dust gets into the pores of your skin you will likely itch for days! Go very slowly at first, constantly moving and barely touching the board surface. Keep the sanding disk flat most of the time. In places where the disk can not kept flat, it is better to hand sand. The relatively low speed of the drill should prevent any big mistakes. Stay away from the rails. It is safer to hand sand the rails (including the cloth overlaps) and any curved areas. Do not learn the hard way (as so many of us have) and power sand through your cloth As you get the feel for it try allowing the weight of the sander to bear down on the surface, still constantly moving (you should not need to push down hard). Once again ; do not power sand the rails. Hand sanding only, on the rails, take down any drips and excess with a surform file, and #16, or #20 sandpaper. The resin line left around the circumference of the rail when the tape was removed can be mostly removed by dragging a lone razor blade repeatedly over the resin line. This razor blade work and all sanding will be easier if you do it when the resin is newly hardened (as soon as it clicks when hit with your nails). Finish sanding the rails by hand with #50. Although hand sanding is brutally hard work, an entire surfboard can be done with no power tools. If hand sanding only (no power tools), sand the flats, starting with #16, and ending with #50. The photo below shows sanding the lap line before hotcoating using duct tape along the foam side of the lap line to prevent sanding the foam (highly recommended).
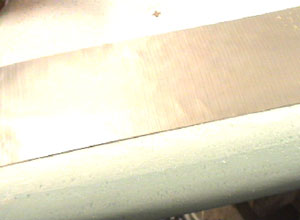
Keep blowing or brushing off the dust and looking closely at the glass. If a small checkerboard pattern becomes visible, don't sand any deeper there (you're seeing the cloth-try not to sand to the cloth). On inspection; low spots may be seen that can not be sanded with the drill sander without penetrating the cloth on nearby high spots. Lightly hand sand these low spots using your finger tips if needed. Try to simply remove all the shine from the entire surface. Just get the bottom smooth and completely sanded, then stop. It is better to sand too little than too much. Just make sure to get all the shine off the surface. Sand the top like the bottom. The top doesn't need to be as smooth as the bottom. If you intend to apply the #16 sanded traction surface mentioned in HOT COAT and GLOSS COAT, do not sand the top hot coat. Take the board out in bright sunlight if possible and look for shiny spots on the top and bottom. These shiny spots may have wax on the surface (polyester only). The gloss coat will look wavy etc., if you leave them It is better to sand too little than to sand too much. |