|
HOME
Introduction
Design
Stands and Blocks
Shaping
Polystyrene
Epoxy
Glassing
Hot coat
Fins
Sanding
Art Work
Gloss Coat
Leash Plug
Books
Material Lists
Resin Amounts
Equipment List
Misconceptions
Tips
Sm Wave Design
Research
Videos
Helpful Links
This is your site. It is not biased
by any direct advertising and no money is accepted for any links shown.
It is made for you and supported by you.
PLEASE DONATE!
HALL OF FAME
~~~~~~~~~~~~~~~
Thanks to the users below
for keeping this site alive and unbiased with their donations.
Mark Sadler
Kevin Kuzma
Mark Griffith
Kirra Oredson
Logan Leitch
Joyce Shingler
Alex Bayer
Greg Bayer
Ian Pirsch
David Shell
Fab Ordonez
Tom Walczewski
Anthony Rynicke
Peter Young
Lori Hartline
Terence Harper
Robert Campbell
Thomas Gustafson
Michael Filanowski
John Gaudette
Philip Meagher
Russell Simms
Randall Kirkpatrick
Calvin Arnold
Preston Renbarger
Mark Schreiter
Mike Sheldrake
Ritchie Ginther
George Young
Michael Simbulan
Bradley Saviello
Poolguy Network
Elan Yaari
Mathieu Corbeil
Sergey Terentev
Anthony Azcona
Hamish Eassie
David Merga
Spencer Ward
.
|
LEASH PLUG
The easiest of all leash plugs is the stick on plug at www.ofishl.com.
No drilling or tools are needed with this plug. Buy the kit
with the rope and resin included or just the plug. The shipping
is about two times the cost of one plug so you might want to buy
enough for any future boards. Ofishl sells accessories to
make it lockable. I recommend putting it on after the gloss
coat has hardened.
Do the following:
- Put a 2" piece of string through the hole and tie in a
knot so it can not hang over the edge.
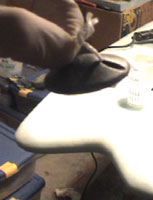
- Using a drill sander and #50 disk, sand the center, bottom
of the plug for a few seconds (make it slightly concave) - this
will allow you to put it flat on a curved surface. Sand the part
of the board it will sit on by hand.
- Brush on a thick layer of resin on the bottom of the plug,
or dip the bottom surface of the plug into a cut off paper cup
with epoxy in the bottom (a five minute epoxy kit works well for
this - do not use Loctite brand - weak). Stick the plug
as far back on the top tail as practical.
- Wipe off any excess resin leaving a little extra around the
edge.
- If not using five minute epoxy, tape the plug (keep the tape
away from the plug edge) so that it will not slide slowly downward.
- If buying only the plug, buy 1/8"(3.2mm) nylon rope (available
at Lowe's, etc.).
- Cut a few pieces in 8" lengths and burn the ends slightly
(some leashes are sold with a rope).
- Remove the string and replace it with the rope. Tie the loop
in a double knot.

If installing a conventional leash plug/cup, do the following::
- After the hot coat, use a 1" or 1&1/8" paddle
bit (take leash plug when selecting paddle bit) to drill the hole
through the hot coat, into the foam. A hole saw works better,
but is more expensive.
- Mark the paddle bit with tape at the box depth.
- Drill slowly, checking for proper depth.
- Try to get it flush with the top of the board.
- Cut one square inch of cloth into shreds and, mix the shreds
with about one ounce of catalyzed resin.
- Spread the mix around the hole (not all of it) and insert the
plug. Fill all air spaces with the remaining mix. Re-check
before the resin gels, and re-fill if resin has seeped down.
- Wipe up any excess.
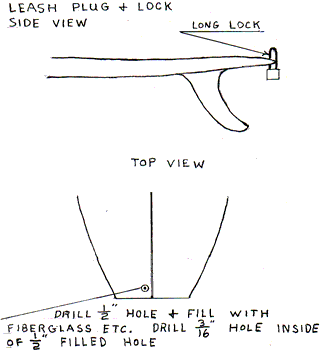
If shipping is a problem install the lockable do-it-yourself plug
below.
- After the hot coat, drill 1/2" hole no more than 1"
from the middle end of the tail (check to make sure lock will
fit) - after the hot coat.
- Put duct tape across bottom of hole.
- Cut one square inch of fiberglass cloth into small shreds.
- Mix one ounce total resin and hardener.
- Mix shredded cloth with resin.
- Force mix in hole - eraser side of pencil works well as a packer
tool.
- Wipe up excess
- After resin hardens, sand flush
- Drill hardened resin with 1/8" bit, and drill the 1/8"
hole with a 3/16" bit.(make sure you do not drill into
the foam).
- Attach 8" long 1/8"(3.2mm) nylon rope.

[Next]
|
|
|
